All folders, projects, items and resources are installed and managed in a single hierarchical directory on the Command Center. There are four methods for accessing and navigating through this directory:
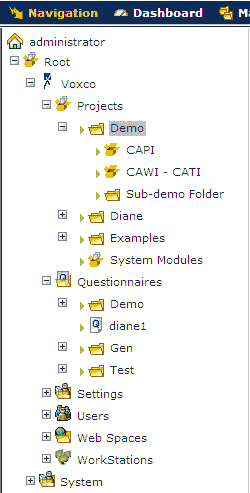
Navigation Tree. The Tree can be opened/hidden at any time by clicking on the Navigation command in the Command Center's main menu. All folders and items within them are displayed with a familiar user interface, operating like the directory tree in MS Windows Explorer. You select a folder or item by clicking on its label; it is opened in the Folder View (see below).
Folder View. When you select any folder (whether through the Navigation Tree or the Folder View Navigation Bar (see below), its contents (folders and items) will be presented in the Folder View. In this view you can navigate forwards by clicking on the sub-folders and items; the specific items that are available depend on the Master folder within which you are currently located.
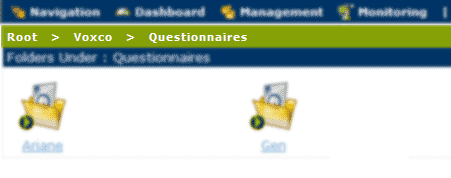
Folder View Navigation Bar. Within the Folder view, the full path to the currently selected folder or item is shown in a green toolbar located at the top of the window. You can navigate backwards to any node in the path simply by clicking on it; this opens up the contents of the node.
Note: The Navigation bar is not included in the Dashboard window. To navigate to any item which is not visible in the Dashboard's Project list, use the Navigation Tree (see above).
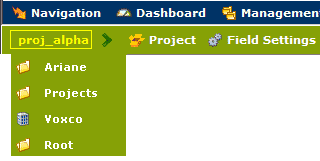
Project Page. When a project is selected, it displays its own (green) menu bar. The left-most item is the project name. When you click on the project name, a drop-down list allows you to select any node in the path to it.
To access the Tree
The Tree appears/disappears when you click on the Navigation command in the main menu. The Tree is presented on the left-hand side of the screen:

Whenever a node in the hierarchy contains other items, it is pre-fixed with a + or - sign. When you expand the node, i.e. click on the + sign its contents will be displayed below. When a node's content is displayed, it is prefixed with a - sign. When you collapse the node, click on the - sign, its contents will be hidden from view and it will be prefixed with a + sign again.
A single click on a folder's label in the Tree, opens it up it Folder View.
A single click on an item's label opens it up in Folder View with its Settings displayed.
The Folder View, which displays all sub-folders and items within the currently selected folder, allows you to navigate forwards. If you click on any folder, this makes it become the current folder, and its corresponding sub-folders and items (if any) will then be displayed.
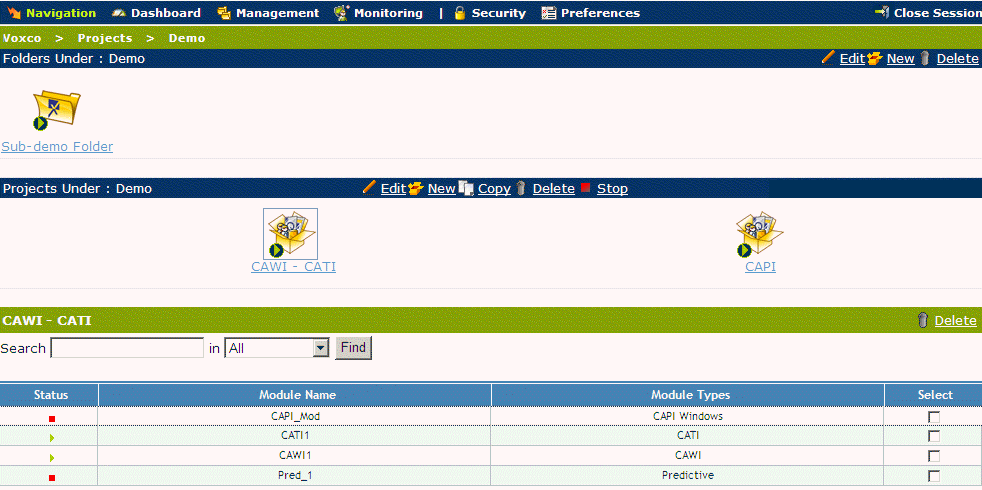
The following screen-shot shows that the current folder is called Demo. The Folder View is divided into 3 sections:
The upper section lists any (sub) folders that may be contained; in this example there is one titled Sub-demo Folder. Clicking on this folder would make it become the current folder.
The middle section displays any items/lists within the currently folder. In this example, there is project titled CAWI-CATI .
The middle section's Toolbar contains buttons to create a New item, and to Edit, Copy, Delete, Stop/Pause/Activate any item which is currently selected under it.
The lower section displays summary detail of the currently selected item. Since the item CAWI_CATI is selected, and it is a project, the collection and telephony modules which have been assigned to it are listed.

In the Folder View, the Navigation Bar (green), always shows the complete path to the currently selected folder or item, and allows you to navigate backwards to any node displayed in its path which you click on.

Within the project page, the full path to the currently selected project is shown in the drop-down list accessed from the project name (the left-most item in the green project menu bar). You can navigate backwards to any node in the path simply by clicking on it; this opens up the contents of the node.
