Home > Command Center > Interface > CAPI File Management
The CAPI File Management service is available under the CAPI Dashboard. File transfers from the server to laptops, and vice versa, which are not project-specific, are carried out during synchronization sessions with the laptops.
Files resident on the server can be downloaded manually to specified folders (target paths) on the laptops of selected interviewers. Specified files can be retrieved, in automated fashion, from laptops by means of the File Management Settings. The Settings also allow the automatic execution of DOS commands before and after synchronization, and uploading of files on laptops to the server.
The toolbar is shown below:


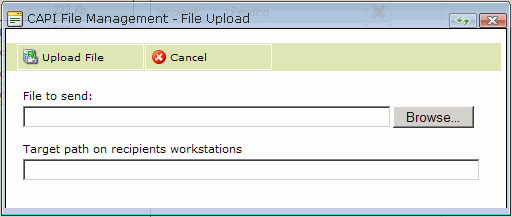
Upload of Files: To send files, they must first be uploaded to the server using the Upload File command in the toolbar. Files that have been uploaded appear in the left-hand list. To remove a file from the list, first select it and then click on the Delete command in the toolbar. When uploading a file, the dialog window prompts you to browse for the file itself, and also to specify the target path on the laptop to which it will be sent.

Sending of Files: When you click on the Accept button in the toolbar, the files in the list will be sent to interviewer workstations. Before doing so, for each file in the list you must select the workstations to which they are to be sent. The steps are as follows:
Select a file in the left-hand list. The right-hand list will display recipient workstations (interviewers) that have already been selected if applicable.

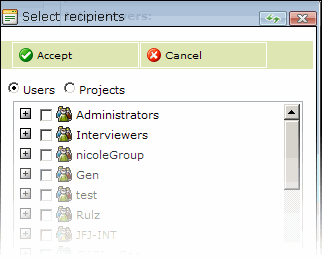
To select interviewers click on the icon to the right of the recipients list. The selection dialog window will appear. You can select a whole group of interviewers or individual interviewers within a group. If you click on the Projects radio button, you can select Project Groups and/or Projects, and the files will then be sent to all of the interviewers attached to that project or, if necessary, a particular CAPI collection module in that project.

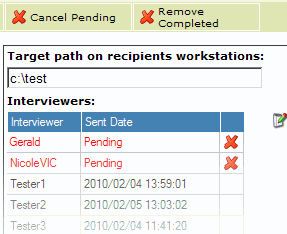
Repeat steps 1-2 for each of the files. After that you can click on the Accept button in the toolbar. For each file, the right-hand list will then reflect the state for each interviewer (recipient); this state will change as interviewers conduct their synchronization sessions. The Sent date column will show ‘Pending’. Click on the Tool bar Accept button to confirm sending the file. When the file is received, the Sent date column will show the date and time of reception on the recipient’s laptop

If you first select an interviewer in the list, you can then use the commands in the toolbar to Cancel a Pending item, or Remove a Completed item from the list.
Files are received as a result of the execution of Settings (see below).Files that have been sent from interviewer workstations are displayed in the Received Files list:

The Download command in the toolbar will download the file selected in the list; the Delete command will remove it.
The Settings are used to automate the sending of files on laptops to the server, and the execution of operations on the laptops via the use of DOS commands:

In the Retrieve files window, you specify the full path to folders containing files to be retrieved. The check-box allows you to have the files deleted from the interviewer workstation after synchronization.
In the DOS commands windows, you specify the commands to be executed before and after synchronization respectively.